Ultimate Guide to RV Underbelly Tape: Protect Your RV with These Essential Tips
When it comes to maintaining your RV, there are countless products that promise to make life on the road smoother. One such product is RV underbelly tape. This specialized tape serves a critical function in protecting the underside of your RV, ensuring it remains durable and well-maintained, even after miles of travel. In this blog post, we’ll dive into what RV underbelly tape is, why it’s essential, and how to use it effectively.
What is RV Underbelly Tape?
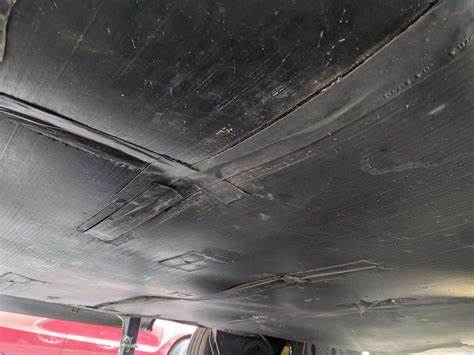
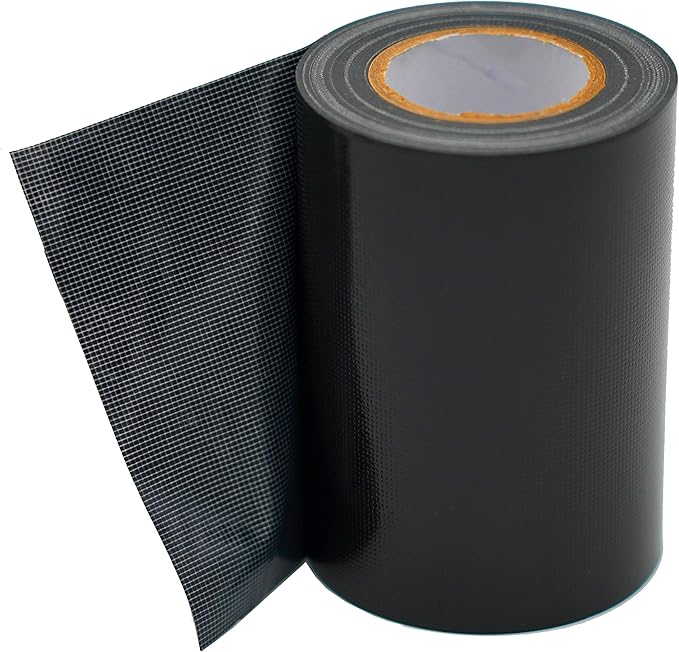
RV underbelly tape is a heavy-duty, adhesive tape designed to repair or seal the underbelly of your RV. The underbelly is the bottom layer that protects the internal components of your RV, such as plumbing and wiring, from the elements and road debris. Over time, the underbelly can develop tears or holes due to road wear, weather exposure, or even wildlife. This is where underbelly tape comes into play, offering a quick and reliable solution to patch up those vulnerabilities.
Why is RV Underbelly Tape Important?
The underbelly of an RV is often overlooked, but it’s crucial for the overall health and longevity of your vehicle. Here’s why underbelly tape is a must-have:
- Protection from Elements: The underbelly is exposed to various elements like rain, snow, mud, and road salt. If this layer gets damaged, moisture and debris can infiltrate the undercarriage, leading to rust, mold, or even damage to the RV’s internal components.
- Preventing Heat Loss: A damaged underbelly can also lead to heat loss, making your RV less energy-efficient. Sealing any gaps with underbelly tape helps maintain a stable internal temperature, which is especially important in colder climates.
- Extending RV Lifespan: By regularly checking and repairing the underbelly with this tape, you can prevent small issues from turning into costly repairs, ultimately extending the lifespan of your RV.
How to Use RV Underbelly Tape
Using RV underbelly tape is relatively straightforward, but there are a few tips to ensure the best results:
Inspect Regularly: Even after applying the tape, it’s good practice to regularly inspect the underbelly for any new damage or signs that the tape is peeling.
Clean the Surface: Before applying the tape, make sure the area is clean and dry. Any dirt, grease, or moisture can prevent the tape from adhering properly.
Cut to Size: Measure the area that needs repairing and cut the tape to size. It’s always better to cut a piece that’s slightly larger than the tear or hole to ensure full coverage.
Apply Evenly: Press the tape firmly onto the surface, making sure there are no air bubbles or wrinkles. This will ensure a tight seal.
Choosing the Right RV Underbelly Tape
Not all tapes are created equal, so it’s essential to choose a product that’s up to the task. Look for underbelly tapes that are:
- Weatherproof: The tape should be able to withstand extreme temperatures and moisture without losing its adhesive properties.
- Durable: Opt for a tape that is thick and strong enough to handle the wear and tear of road travel.
- Flexible: The tape should be flexible enough to conform to the contours of your RV’s underbelly without cracking.
Conclusion
RV underbelly tape might not be the most glamorous product in your RV maintenance toolkit, but it’s undoubtedly one of the most important. Regularly inspecting and repairing your RV’s underbelly can save you from costly repairs down the road and help ensure that your adventures on the road are smooth and worry-free. Whether you’re a weekend warrior or a full-time RVer, keeping a roll of RV underbelly tape on hand is a smart move.
At Timberline Campground, we’re here to help make your trip planning effortless. Whether you’re seeking a serene spot for relaxation or thrilling outdoor activities, our campground offers the perfect blend of nature and comfort. Call us today at 515-987-1714 to reserve your spot and start counting down the days until your next RV getaway.